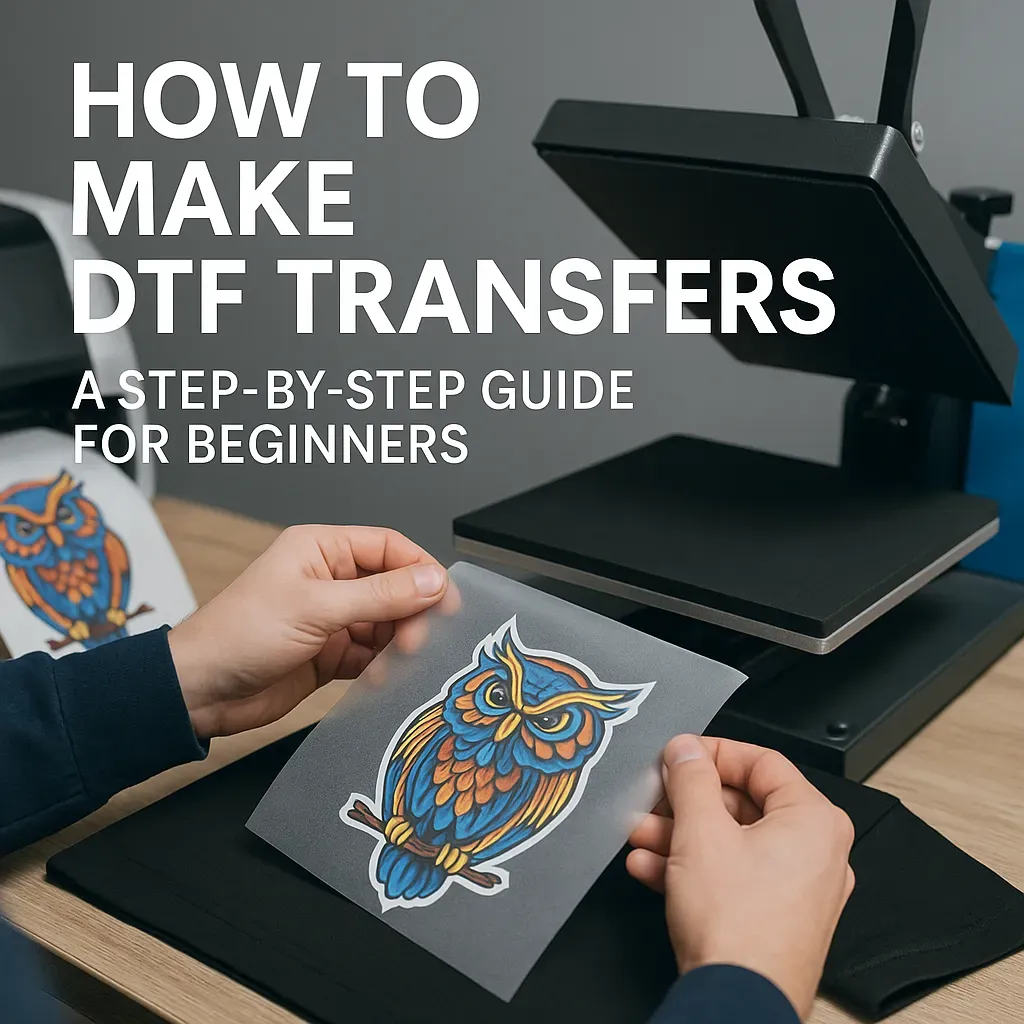
DTF Transfers for Beginners can feel overwhelming at first, yet a practical roadmap reveals an approachable and affordable path to vibrant, durable prints on a wide range of fabrics, from soft jerseys to sturdy canvas and performance blends that hold color well after washing. This introduction aims to balance theory with hands-on steps, so you can move beyond myths and start developing real competence as you experiment with simple projects and gradually expand your toolkit. As you build momentum, you’ll learn to plan your workflow, manage supplies, and set up a comfortable workspace that minimizes distractions while maximizing your first successful transfers. A deliberate, repeatable process helps you reduce waste, track what works, and refine your designs for brighter colors and crisper details on a growing variety of fabrics. With patience and practice, you’ll transform complexity into confidence, turning initial experiments into a reliable routine that forms the backbone of a fun, scalable DTF project.
Think of this approach as a practical introduction to direct-to-film color transfers, where artwork is prepared for a film medium and then applied to fabric with heat. In this alternative framing, the emphasis shifts from machine setup to the finished look, how it wears, and how reliably it adheres to different textiles. By using terms such as direct-to-film printing, film-to-fabric transfer, and color-rich apparel decoration, you tap into common search patterns that beginners are likely to use. This LSI-informed framing broadens context, linking the workflow, materials, and safety considerations so readers can see practical connections rather than isolated steps. In essence, the idea remains the same: a color-forward transfer method that works across fabrics, with a forgiving process that allows easy comparisons between DTF vs screen printing and welcomes learners at every pace.
Frequently Asked Questions
What is the basic workflow of DTF Transfers for Beginners?
DTF Transfers for Beginners follow a simple sequence: design preparation, printing onto the DTF film, coating with adhesive powder, curing the powder, and transferring the design to fabric with a heat press. Understanding this workflow helps you diagnose issues and improve consistency. This sequence reflects the core ideas in DTF transfer basics.
What should be in my DTF supplies list as a beginner?
A practical DTF supplies list for beginners includes a compatible printer and DTF film, the right ink and adhesive powder, a curing method, a heat press, and basic handling tools (swabs, lint-free cloths, transfer tape). Start with a modest kit to avoid overinvesting and expand as you gain experience.
How do I set up the DTF heat press for reliable results?
DTF heat press setup for beginners means choosing a press with even heat distribution and calibrating temperature, time, and pressure to match your fabric. Begin with common fabrics, run test swatches, and adjust settings based on results to achieve reliable adhesion.
DTF transfers vs screen printing: which method suits beginners best?
DTF transfers vs screen printing: for small runs and full-color designs, DTF transfers are usually quicker to set up and more versatile across fabrics; screen printing can be more cost-effective for large runs but requires more setup. Consider project size, budget, and fabric type when choosing.
How to start DTF printing as a beginner: a step-by-step plan?
How to start DTF printing as a beginner involves outlining a practical plan, building a starter toolkit, learning design prep, printing onto film, applying powder, curing, and pressing, then testing and documenting results to refine your process.
| Section | Key Points | Notes |
|---|---|---|
| Introduction | DTF Transfers for Beginners can seem overwhelming at first, but with a clear core concept and a practical roadmap, the method is approachable, affordable, and capable of vibrant prints on many fabrics. | Suitable for hobbyists and small side-hustles; emphasizes forgiving workflow and durable results. |
| Defining DTF transfers and why they matter to beginners | DTF involves printing on film, applying adhesive powder, curing, and transferring to fabric with a heat press; it offers flexibility across fabrics, bright color saturation, and a simpler workflow than some other methods. | Beginners benefit from a clear plan covering equipment, supplies, design prep, and the pressing process. |
| A practical roadmap to get you started | Treat it as a step-by-step project: start with the right tools, then move through design, printing, powdering, curing, and pressing; aim for steady progress rather than perfection. | This builds a solid foundation for ongoing learning. |
| Understanding the workflow and terminology | The workflow includes design preparation, printing onto transfer film, coating with adhesive powder, curing, and transferring to fabric with heat and pressure. | Knowing the sequence helps diagnose issues and improve consistency; often called the DTF process. |
| Essential equipment and supplies (DTF supplies list) | Printer and film, ink and adhesive powder, curing system, heat press, plus cleaning swabs, transfer tape, towels, and blunt tools for handling films. | A practical starter kit guide that can be refined over time. |
| Designing for DTF: image quality, color, and layout | Use high-resolution artwork (vector for logos, or 300 DPI for raster), manage color gamut, and adjust brightness/contrast as needed. | Export in proper color spaces and track ink usage to avoid runs mid-project. |
| Printing and applying the powder (the core of the DTF process) | Print on DTF film, apply adhesive powder evenly, then cure to create a robust transfer; aim to minimize background specks. | Curing solidifies the powder and strengthens wash durability. |
| The pressing stage: achieving reliable adhesion (DTF heat press setup) | Calibrate temperature, time, and pressure for each fabric; cotton may need higher temps and longer dwell times, while synthetics need gentler settings. | Understand fabric thickness, ambient temperature, and press distribution to apply consistent pressure. |
| Fabric choices, care, and durability | DTF works on many fabrics (cotton, blends, some polyesters); always test on a small piece and follow care advice (wash inside out, avoid high heat). | Keep a care chart to minimize returns and boost customer confidence. |
| Troubleshooting and common pitfalls (DTF transfer basics in practice) | If adhesion or color looks off, adjust powder, curing, or press settings; log issues and fixes for future reference. | Document issues and solutions as your personal practical manual. |
| Safety and maintenance for long-term success | Ensure proper ventilation, safe handling and storage of powders, and regular maintenance of print heads and the heat press; store films dry. | A clean, organized workspace prolongs equipment life and reduces defects. |
| Costs, budgeting, and scaling your DTF projects | Upfront costs exist, but long-term returns can be favorable with careful planning and batching. | Track cost per transfer (consumables, electricity) and gradually expand when demand grows. |
| DTF transfers versus other methods (DTF vs screen printing) | DTF offers faster setup for small runs and full-color flexibility; screen printing is cost-effective for large runs. | Evaluate goals, budget, and fabrics to choose or combine methods over time. |
Summary
DTF Transfers for Beginners is a practical, approachable journey toward turning your designs into wearable art. This conclusion reinforces starting with solid fundamentals—a basic supplies list, a clear workflow, and a measured approach to heat press setup—so you can build reliable, vibrant prints step by step. As you test fabrics, refine artwork, and document results, your confidence grows and your ability to scale without reinventing the wheel increases. By balancing experimentation with careful planning, you’ll discover the beginner-friendly roadmap that supports creativity, consistency, and small-scale success in DTF transfers.